3. Everyday use
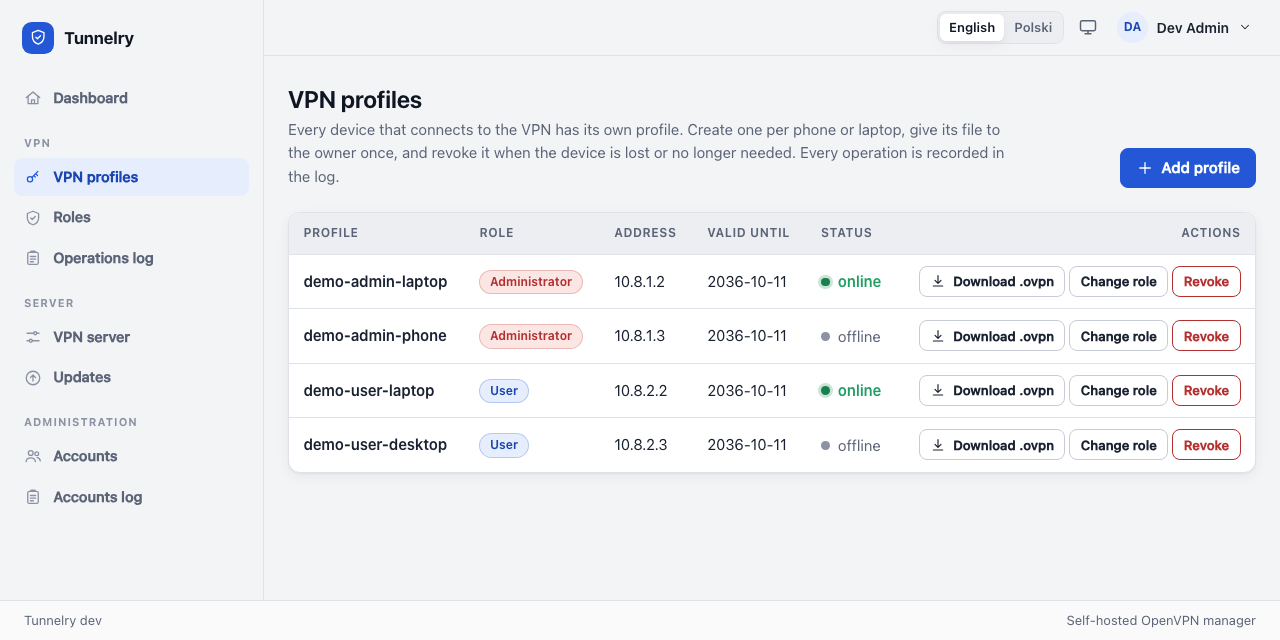
Profiles (VPN profiles in the menu)
- Create a profile for each device, give it a clear name (
jane-laptop) and a role. Download the.ovpnfile once and send it to its owner through a safe channel. - Change role moves a device to another role; its address changes and it reconnects.
- Revoke permanently cuts a device off (a lost phone, a former colleague). It cannot be undone; to let the person back, create a new profile. You must type the profile's name to confirm.
- The audit log records who did what and when.
Roles and access rules (Roles in the menu)
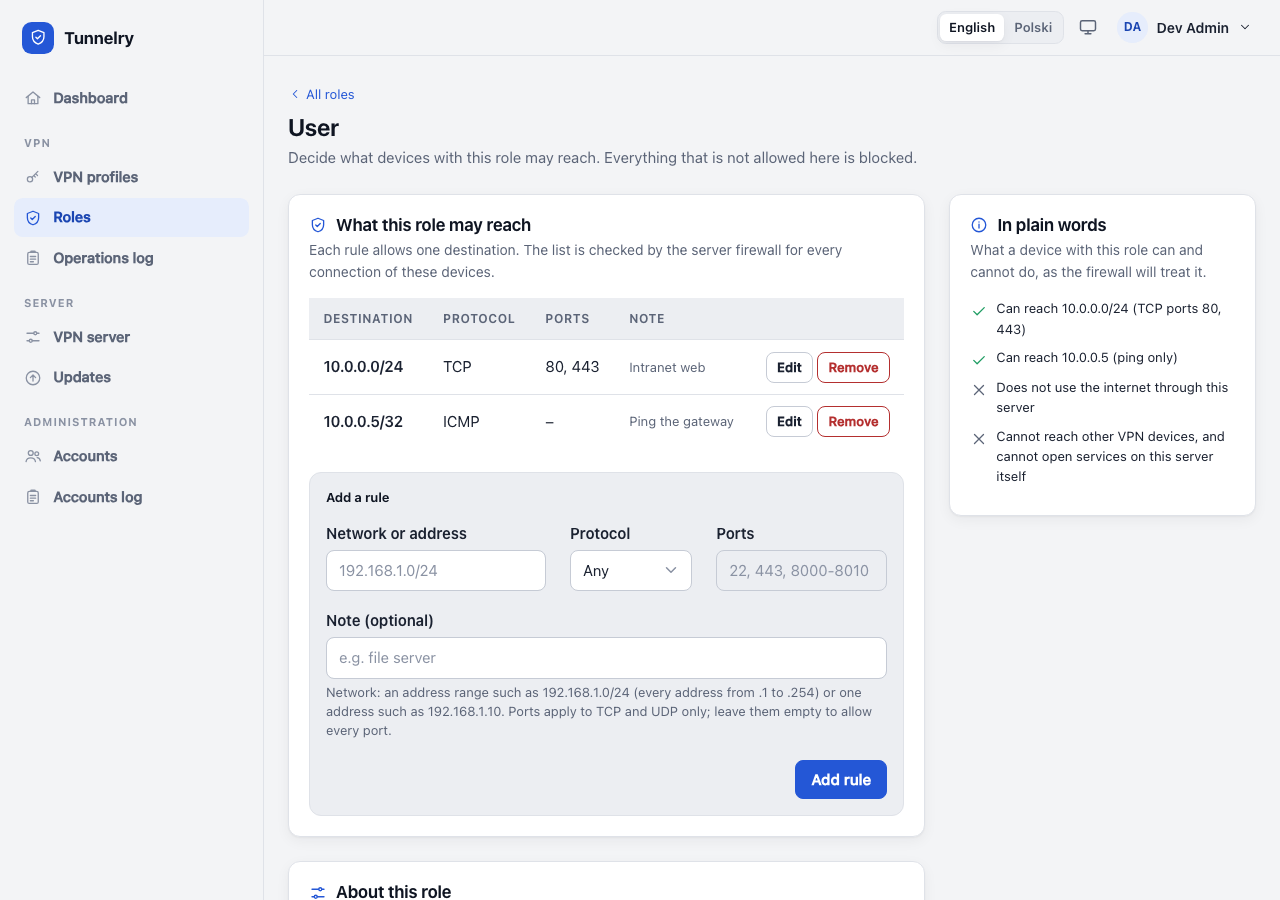
A role is a list of things its devices may reach, for example "10.0.0.0/24, TCP 443 and 8080" or "everything in 192.168.1.0/24". The wizard creates two roles, administrator (everything in the chosen networks) and user (web services and ping); you can add your own and give each one:
- allowed destinations (a network or a single address), the protocol and ports;
- optionally internet access through the server;
- optionally privileged: only people allowed to handle administrator profiles can issue profiles in it.
The page shows what a role can reach, in plain words, before you apply. Devices cannot see each other and cannot open the server itself, whatever the roles say.
Applying changes
Edits to roles, rules and server settings are saved but not live until you press Apply in the bar at the top of the page. After applying, confirm within the time shown, or the server rolls the change back. This is what keeps a mistake from locking you out.
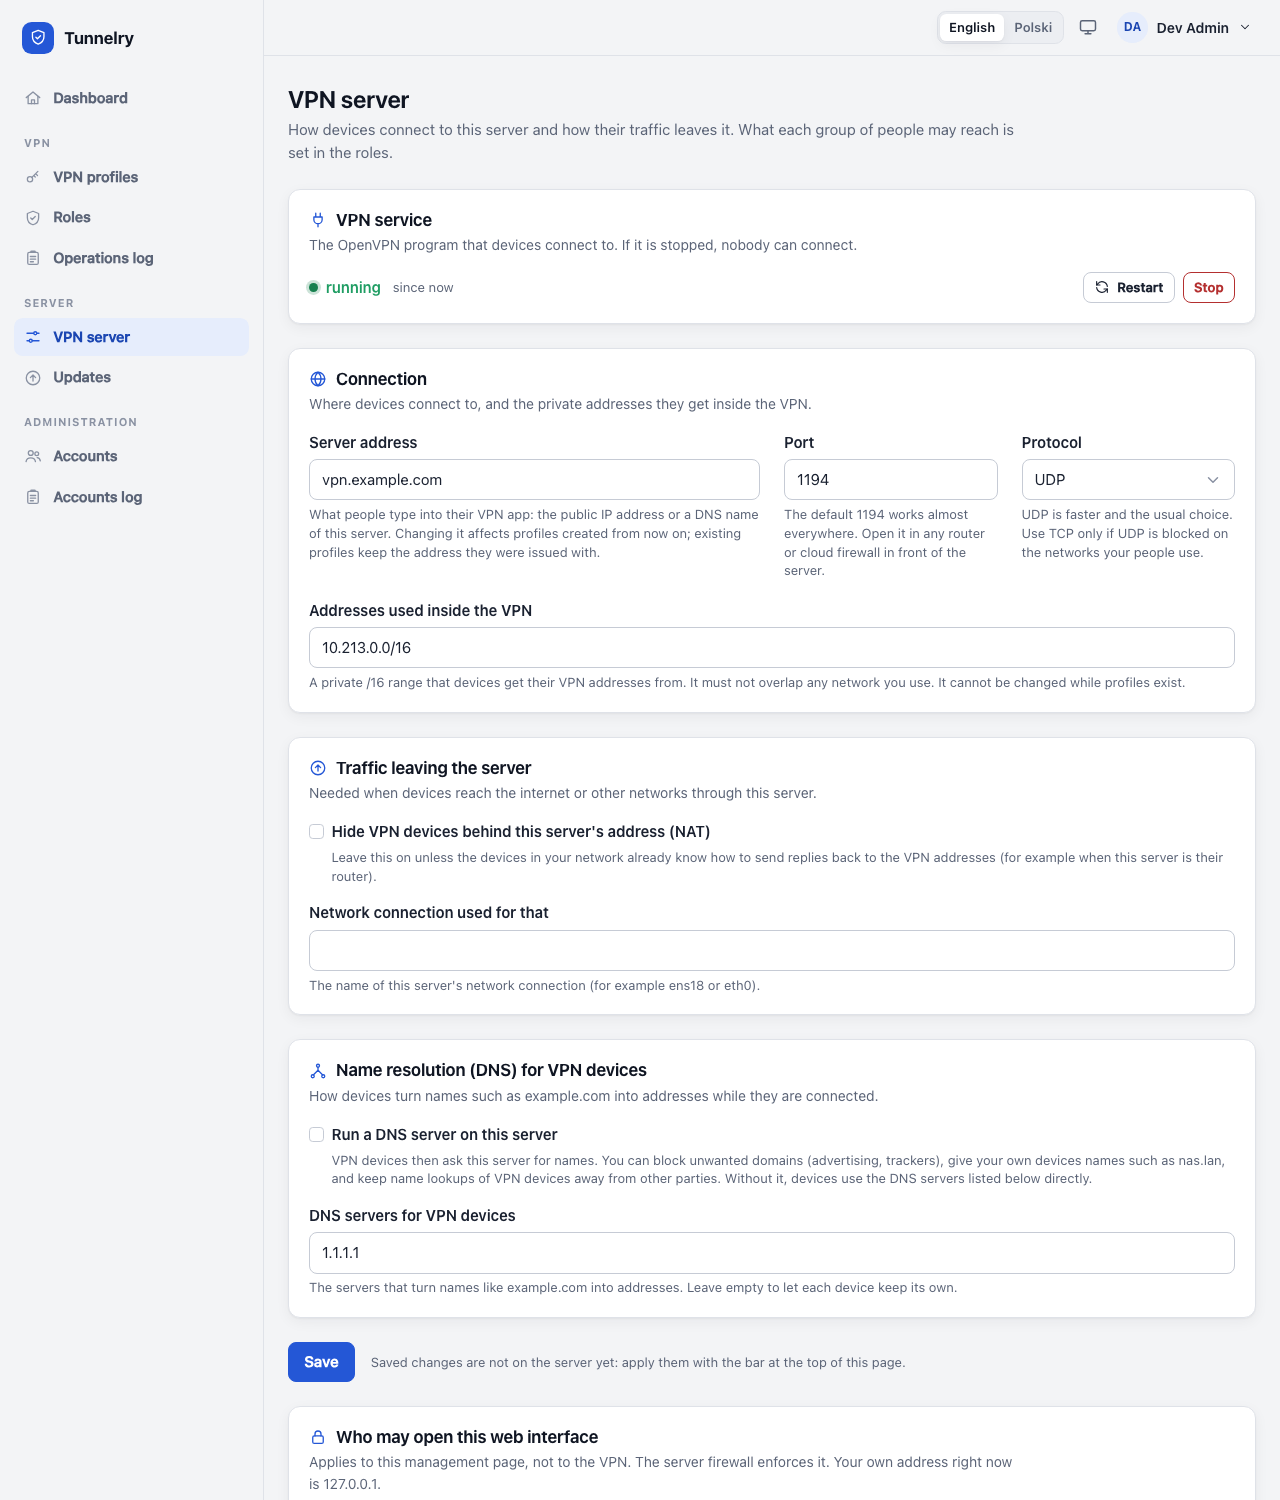
The server (VPN server in the menu)
- VPN service: start, restart, stop. Restarting briefly disconnects everyone (they reconnect by themselves).
- How devices connect: address, port, protocol, the VPN's address range, whether the server translates addresses (NAT) for internet access.
- DNS server: an optional built-in resolver for VPN devices. You can block unwanted domains (one per line; the
domain and everything under it) and add your own names (
nas.lan 192.168.1.5). Without it, devices use the public DNS servers you list. - Who may open this web interface: see guide 6.
Dashboard
Administrators who manage the server see, on the Dashboard:
- Server health: the VPN service, the firewall, the DNS server (if on), how many days are left on the certificates and the revocation list, and free disk space. A warning appears 60 days before something expires.
- Connected now: every device with its address, how long it has been connected and how much it has transferred, with a Disconnect button (the device may connect again; to stop it for good, revoke the profile).
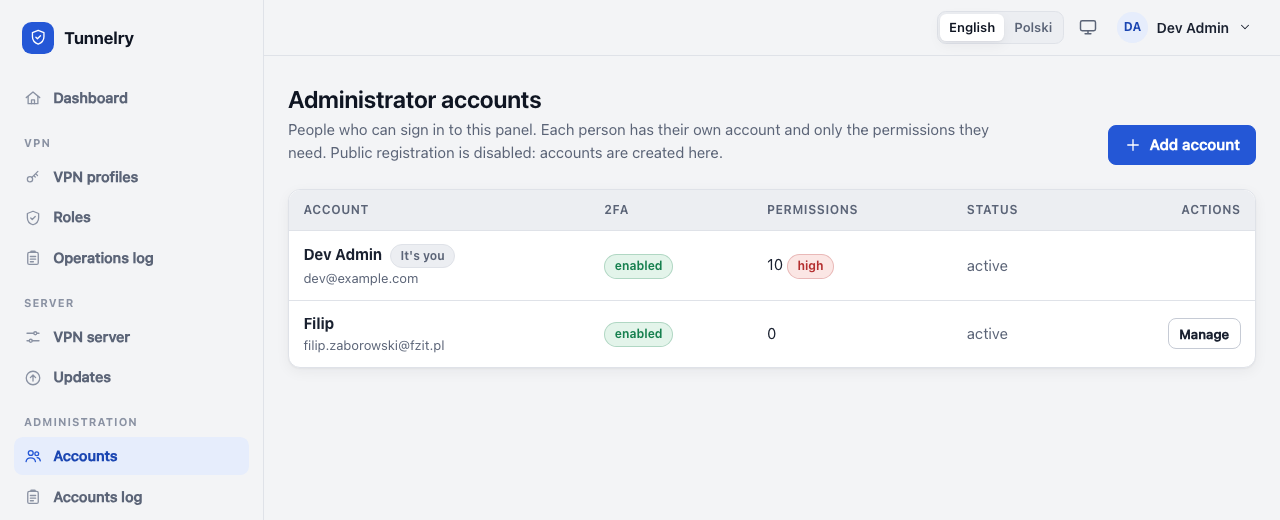
Accounts (Accounts in the menu)
Create more administrators and give each only the permissions needed: view profiles, create, revoke, change role, download, read the audit log, manage the server, manage users.
Two-factor authentication (Security in the user menu)
Two-factor authentication adds a code from an app on your phone to signing in, so a stolen or guessed password is not enough to get into the panel. It is offered to everybody at the first sign-in and strongly recommended, but each person decides. Until you turn it on, a reminder stays at the top of the pages. On the Security page you can turn it on or off, show or renew your recovery codes, and change your password.
Someone who manages permissions can require it for all accounts (Security → Two-factor authentication for everybody). Accounts without it can then only open the Security page until they set it up. Make sure your own account has it first; the page will not let you lock yourself out.
From the console
Most pages have a console twin for scripts: tunnelry:access (roles and rules), tunnelry:dns, tunnelry:apply,
tunnelry:gui-access, tunnelry:update. Run them as the application user, for example:
sudo -u tunnelry php /opt/tunnelry/current/artisan tunnelry:access list
Next: updating.