9. WireGuard and OpenVPN
Tunnelry can serve two kinds of VPN at the same time. OpenVPN is the established one: it works on almost any network and has apps for every system. WireGuard is newer, faster and gentler on a phone's battery, and a device is set up by scanning a QR code. You choose per device which one it uses; roles, rules and the audit log are the same for both.
Which one for which device
| OpenVPN | WireGuard | |
|---|---|---|
| Best for | laptops, routers, networks that block UDP | phones and tablets |
| Set up by | importing a .ovpn file | scanning a QR code (or importing a .conf file) |
| Can be downloaded again | yes | no: the file is shown once, then you issue a new one |
| Disconnect button | yes | no: revoke the profile instead |
If you are unsure, use OpenVPN for computers and WireGuard for phones.
Turning WireGuard on
- Open VPN server and switch on Use WireGuard. Tunnelry proposes a port (UDP 51820) and a network of its own for WireGuard devices, next to the one OpenVPN uses. Change them only if they clash with something you have.
- Press Save, then Apply in the bar at the top, and confirm in time (as for any change to the server).
- Open the port in your router. WireGuard needs its own UDP port (51820 unless you changed it) forwarded to the server, in addition to the OpenVPN port. A firewall in the cloud needs the same rule.
The wizard asks the same question for a new server, under Advanced options. The server needs the wireguard-tools
package; the installer and updates install it for you. VPN server shows the state of both services in the VPN
service card, each with its own start, restart and stop.
You can switch a protocol off again, but only while no profile uses it: revoke those profiles first.
Adding a WireGuard device
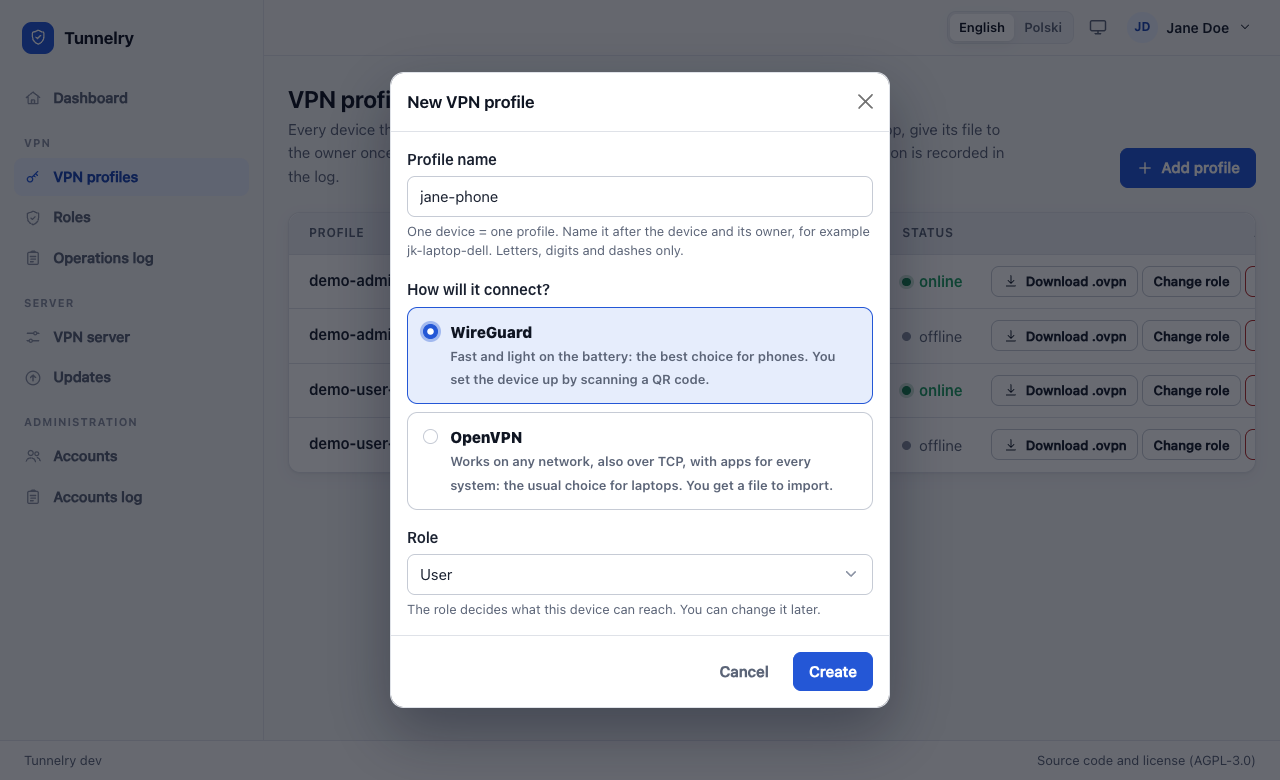
Open VPN profiles, press Add profile, choose WireGuard, give the device a name and a role.
A window shows a QR code. On the phone install the WireGuard app, tap Add and scan the code. On a computer, press Download file and import the
.conffile in the WireGuard app.Press I have set up the device.
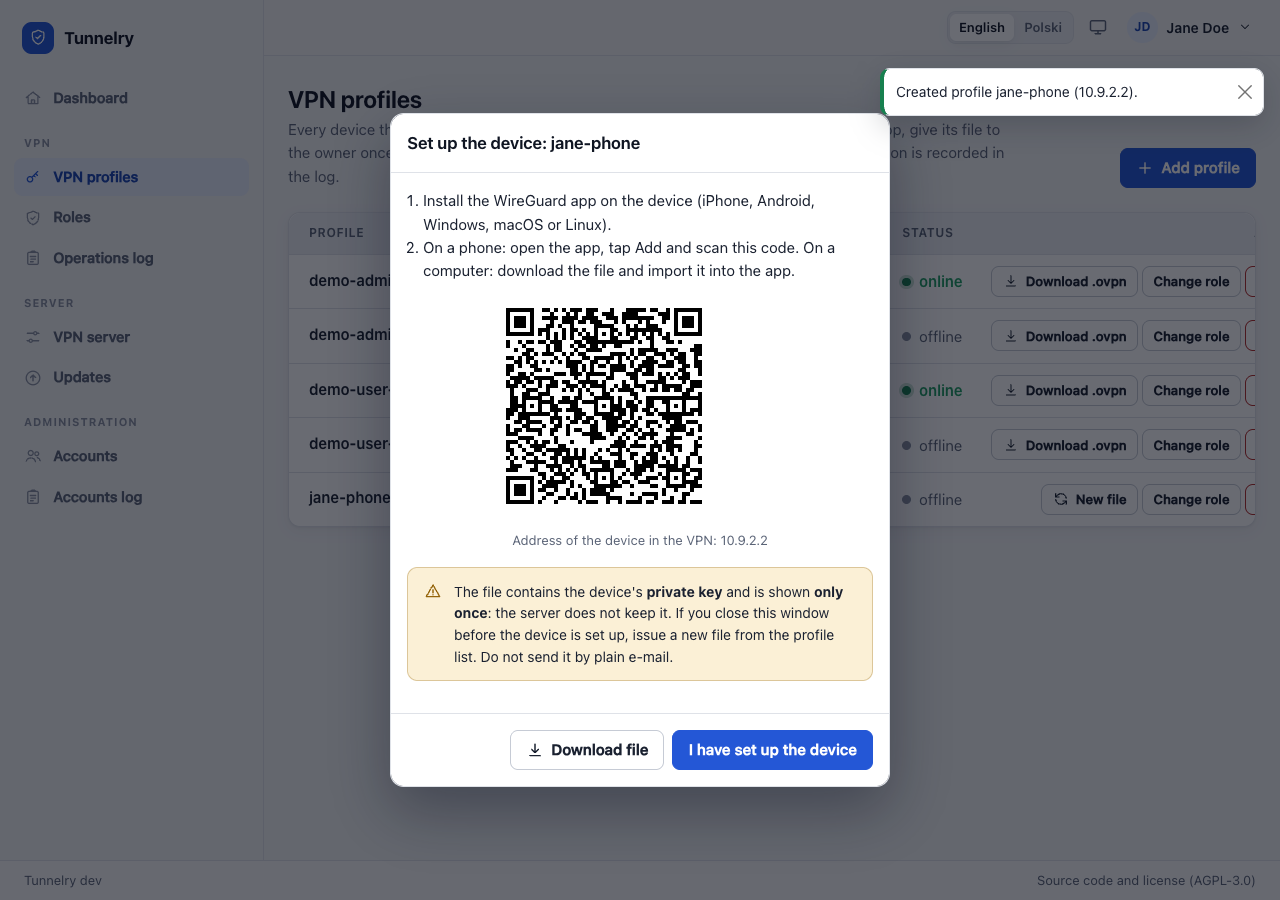
The file contains the device's private key. It is shown once: the server keeps no copy. If you close the window too early or lose the file, press New file on that profile: the device gets a new key and a new file, and the old file stops working at once. Do not send the file by plain e-mail.
Changes that need a new file
- Changing the role of a WireGuard device gives it a new address, and its address is part of its file. So you get a new file (shown once) and the old one stops working.
- A WireGuard file lists the destinations the device sends into the VPN. When you add destinations to a role later, the firewall follows at once, but an older file does not route them yet. Such a device is marked needs a new file in the list: press New file and set it up again.
- Revoking a device cuts it off immediately.
Seeing who is connected
The Dashboard lists devices of both kinds under Connected now. WireGuard has no sessions, so a WireGuard device shows its last contact with the server instead of a connection time. It counts as connected while it has been in contact within the last three minutes.
Switching OpenVPN off
If you want only WireGuard, revoke the OpenVPN profiles and switch OpenVPN off on VPN server. Nothing is reinstalled and the roles stay as they are.
When a WireGuard device does not connect
- The port is not open: forward UDP 51820 (or your port) in the router and check the cloud firewall.
- The device has an old file: after a role change or New file, only the newest file works.
- On the server,
sudo wg show tunnelry1lists the devices that have contacted it and when.
sudo systemctl status tunnelry-wireguard
sudo wg show tunnelry1
WireGuard here carries IPv4 only, like OpenVPN: IPv6 is switched off. A role with internet access sends the device's IPv6 traffic into the tunnel as well, where it is dropped, so nothing leaks around the VPN.